Live Racks
Max for Live devices
-
Services
- Mastering
- Max for Live development
- Tuition, workshops, consultancy
-
Live Racks
- AD2 Suite
- SD Suite
- Textures
- Channel Strip
-
Max for Live devices
- LivePlayState
- LiveTime
- LFO MIDI
- YouTube Channel
- Blog
- Contact
Channel Strip Manual
Table of contents
1
Introduction
Thank you for checking out Channel Strip! In this manual you’ll find everything you need to better understand what’s inside Channel Strip and how to use everything effectively.
Channel Strip can save you a lot of time in the creative process. Instead of adding all of the included effects and having to configure all parameters manually each time, Channel Strip already has all the essential tools set up for quick access.
2
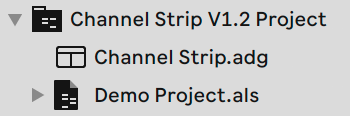
Installation
To start using Channel Strip, unpack the .alp file somewhere in your user library, or in one of your custom folders in Live’s Browser. From here, drag Channel Strip on any desired channel. To speed up your workflow, it is recommended to place Channel Strip on both a MIDI and an Audio channel, and save both as default channels. To do this, right click on the title bar of the channel, and select “Save as Default Audio/MIDI Track”. Make sure that Channel Strip is on the end of the signal chain, so always place any other audio effects before / left of Channel Strip.
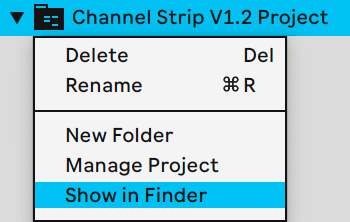
Updates
Every now and then SoundSuite’s devices receive updates. To check if you’re still on the latest version, right click Channel Strip’s project folder and click Show in Finder/Explorer. Once the folder is revealed, double click the www-Check For Updates.url file.
Info View and Macros
Hover over any of Channel Strip’s Controls Macros to reveal information about their usage in Live’s Info View.
3
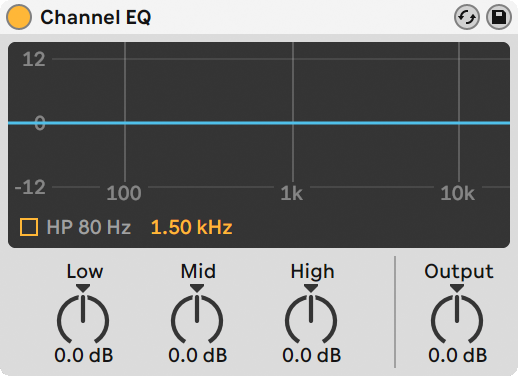
Channel EQ
The first device the audio signal passes through is the Channel EQ, a new addition in Live 10.1. The filter shapes adapt to whether you’re boosting or cutting, enabling quick and musical corrections to your sound.
In adition to the three seperate bands, there is an optional High Pass filter on 80 Hz.
- Low Shelf Gain Boosts around 100 Hz, but cuts on a slightly higher frequency.
- Mid Gain Boosts or cuts on 1500 Hz by default, but this can be changed with the yellow value above the encoder.
- High Shelf Gain Boosts around 5 kHz, but when cutting it is combined with a lowpass filter.
4
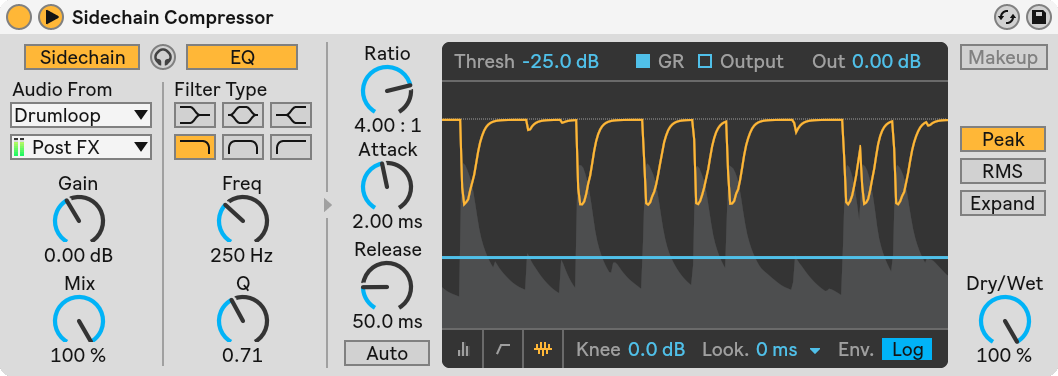
Sidechain Compressor
The next device is the Sidechain Compressor, which is passive by default. To activate it, select a sidechain signal and bring down the Threshold. Additionally, change the Release so that the ducking fits to the groove of the track.
The EQ is also enabled by default, in case the input signal contains more frequencies than desired. For example: the main drums of your song are coming from an (audio) drum loop containing both kicks and snares. The audio will be ducked whenever a peak enters the sidechain, and most of the time it is desired to only let the ducking happen when the kick is playing. In this case, bring down the Cutoff Frequency in the EQ, so that the ducking only happens when low frequencies are playing.
5
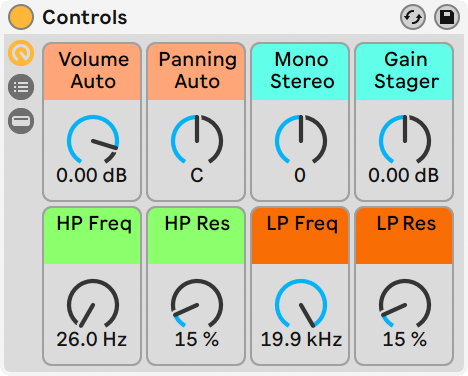
Controls
Controls is an Audio Effect Rack with one single Chain inside. On this Chain are two Utility effects and two Auto Filters. All the essential parameters are mapped to Controls’ eight Macro knobs.
What happens inside
Opening the Chain List will reveal that the Controls Audio Effect Rack contains only one audio Chain, called the Main feed.
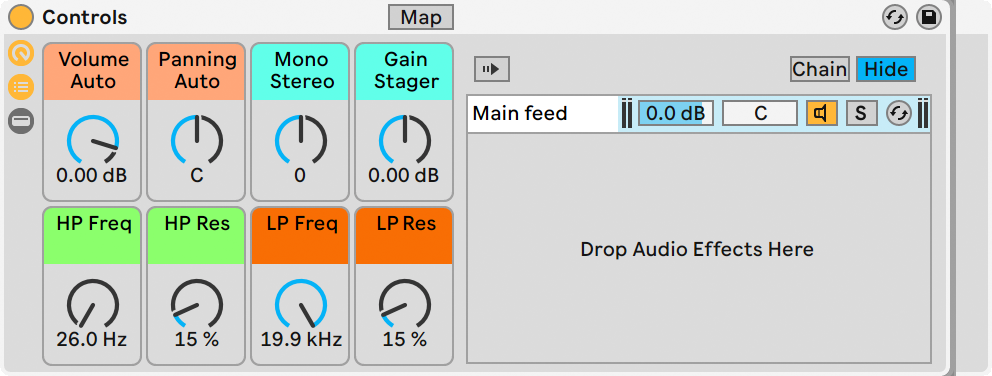
The Main feed Chain houses four effects. First off is a Utility effect, of which the Gain knob is mapped to the Gain Stager Macro.Next in line are the two filters, of which the Freq and Res knobs have all been mapped to their respective Macros.
Notice that when leaving the HP Freq and LP Freq Macros untouched, both Auto Filters are actually deactivated. This is done to make sure the Auto Filters do not alter the audio signal in any way. Other than linear phase EQ’s, any High-Pass filter generally causes phase delay, altering the sound on the low end. This is avoided by turning the filter off when it’s left unused.
Lastly there is one more Utility effect of which the Gain knob is mapped to the Volume Auto Macro, and the Balance knob is mapped to the Panning Auto Macro. Use these two Macros for volume and panning automation, keeping the main mixer free of automation for a streamlined workflow in the mixing process.
In case you want to adjust the channel’s stereo width, there is the M/S Balance knob that is mapped to the Mono Stereo Macro.


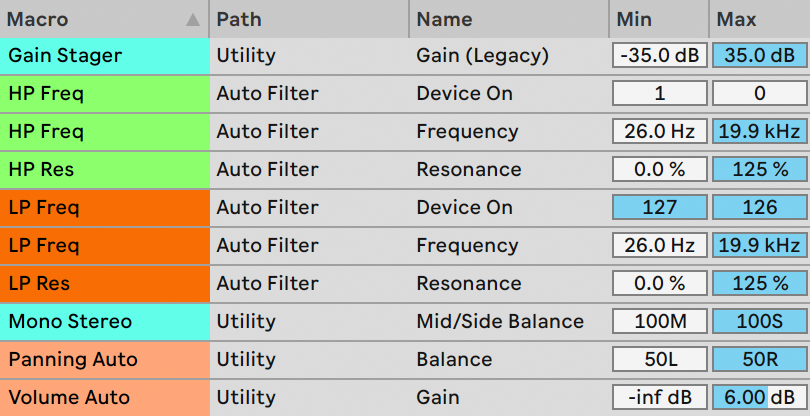
The map window shows all of the parameters that are assigned to the Macros. The most interesting parts here are the Device On functions for HP Freq and LP Freq. As soon as you turn the HP Freq Macro and its value hits 1 (out of 127), the Auto Filter is switched on as the Cutoff Frequency starts on the left end of the frequency spectrum. For the LP Freq Macro its value has to hit 126 as the Cutoff Frequency starts on the right end of the frequency spectrum.
6
Changelog
V1.2 (October 3, 2019)
- Repackaged download file format to Ableton Live Pack (.alp). The new file contains a Channel Strip preset file, a demo project and URL files that lead to the online Manual, Changelog and Update Checker.
- Added info texts to all of Controls’ Macros. Hover over the Macros to read info about them in the Info View.
- Updated the online manual’s Installation chapter in regard to the new changes.
V1.1 (March 1, 2019)
- Added the Channel EQ.
- Added a second Utility effect for volume and panning automation, instead of using the Main feed Chain’s volume and panning controls. This was done because the Utility volume displays only two decimals, whereas the Chain volume control would show more than two decimals.
V1.0 (March 28, 2018)

About SoundSuite
SoundSuite creates tools, videos and lessons about anything involving electronic music production, Ableton Live and Push. SoundSuite is run by Jean-Paul Grobben, an Ableton Certified Trainer based in Amsterdam, Netherlands.
Contact Details
Comeniusstraat 225hs
1065BN, Amsterdam
The Netherlands
Mail@SoundSuite.nl
KVK 53753100